Selecting the right keywords is the fastest way to improve Amazon SEO, increase qualified impressions, and grow sales without wasting ad spend. This guide shows a repeatable, step-by-step keyword selection workflow using the SellerSprite keyword research tool, with practical thresholds, mini examples, and a clean way to build an Amazon keyword list you can reuse across listings and ads.
- A "right" keyword is relevant, high intent, and winnable, not just high volume.
- Start with long-tail keywords to rank faster, then scale to mid-tail and short-tail terms.
- Use SellerSprite metrics like Searches, Purchase Rate, No. of Listings, Relevancy, and SPR to filter objectively.
- Build a single master keyword list, dedupe it, tag it by intent, then assign keywords to listing fields and ad groups.
- Run separate keyword research for Amazon US and Amazon Europe (and other marketplaces). Search behavior and competition differ by marketplace.
- Understand your keyword goals
- What makes a right Amazon keyword
- Step 1: Research seed keywords with SellerSprite
- Step 2: Use filters to find high-value keywords
- Step 3: Build and clean your keyword list
- Step 4: Apply keywords to listings and ads
- Choose keywords for different marketplaces
- Common mistakes to avoid
- FAQ
- Further reading
- References
- About the author
Understand your keyword goals.
Keyword selection is not one-size-fits-all. The right keywords depend on what you are trying to achieve right now. Define your goal first, then choose the keyword type that matches the job.
What makes a right Amazon keyword
A right keyword is a keyword you can win and monetize. Use these four checks before you add any keyword to your Amazon keyword list.
Step 1: Research seed keywords with SellerSprite
Seed keywords are the starting point for keyword research for Amazon. Your job is to collect a wide pool first, then filter hard in Step 2.
Where seed keywords come from
- Your product core term: the simplest name buyers use, like "yoga mat" or "floating wall shelf".
- Your top competitors: pull real keywords from competitor ASINs using Reverse ASIN and Keyword Explorer.
- Buyer modifiers: material, size, use case, audience, problem, and style (example: "non-slip", "extra thick", "for small bathroom").
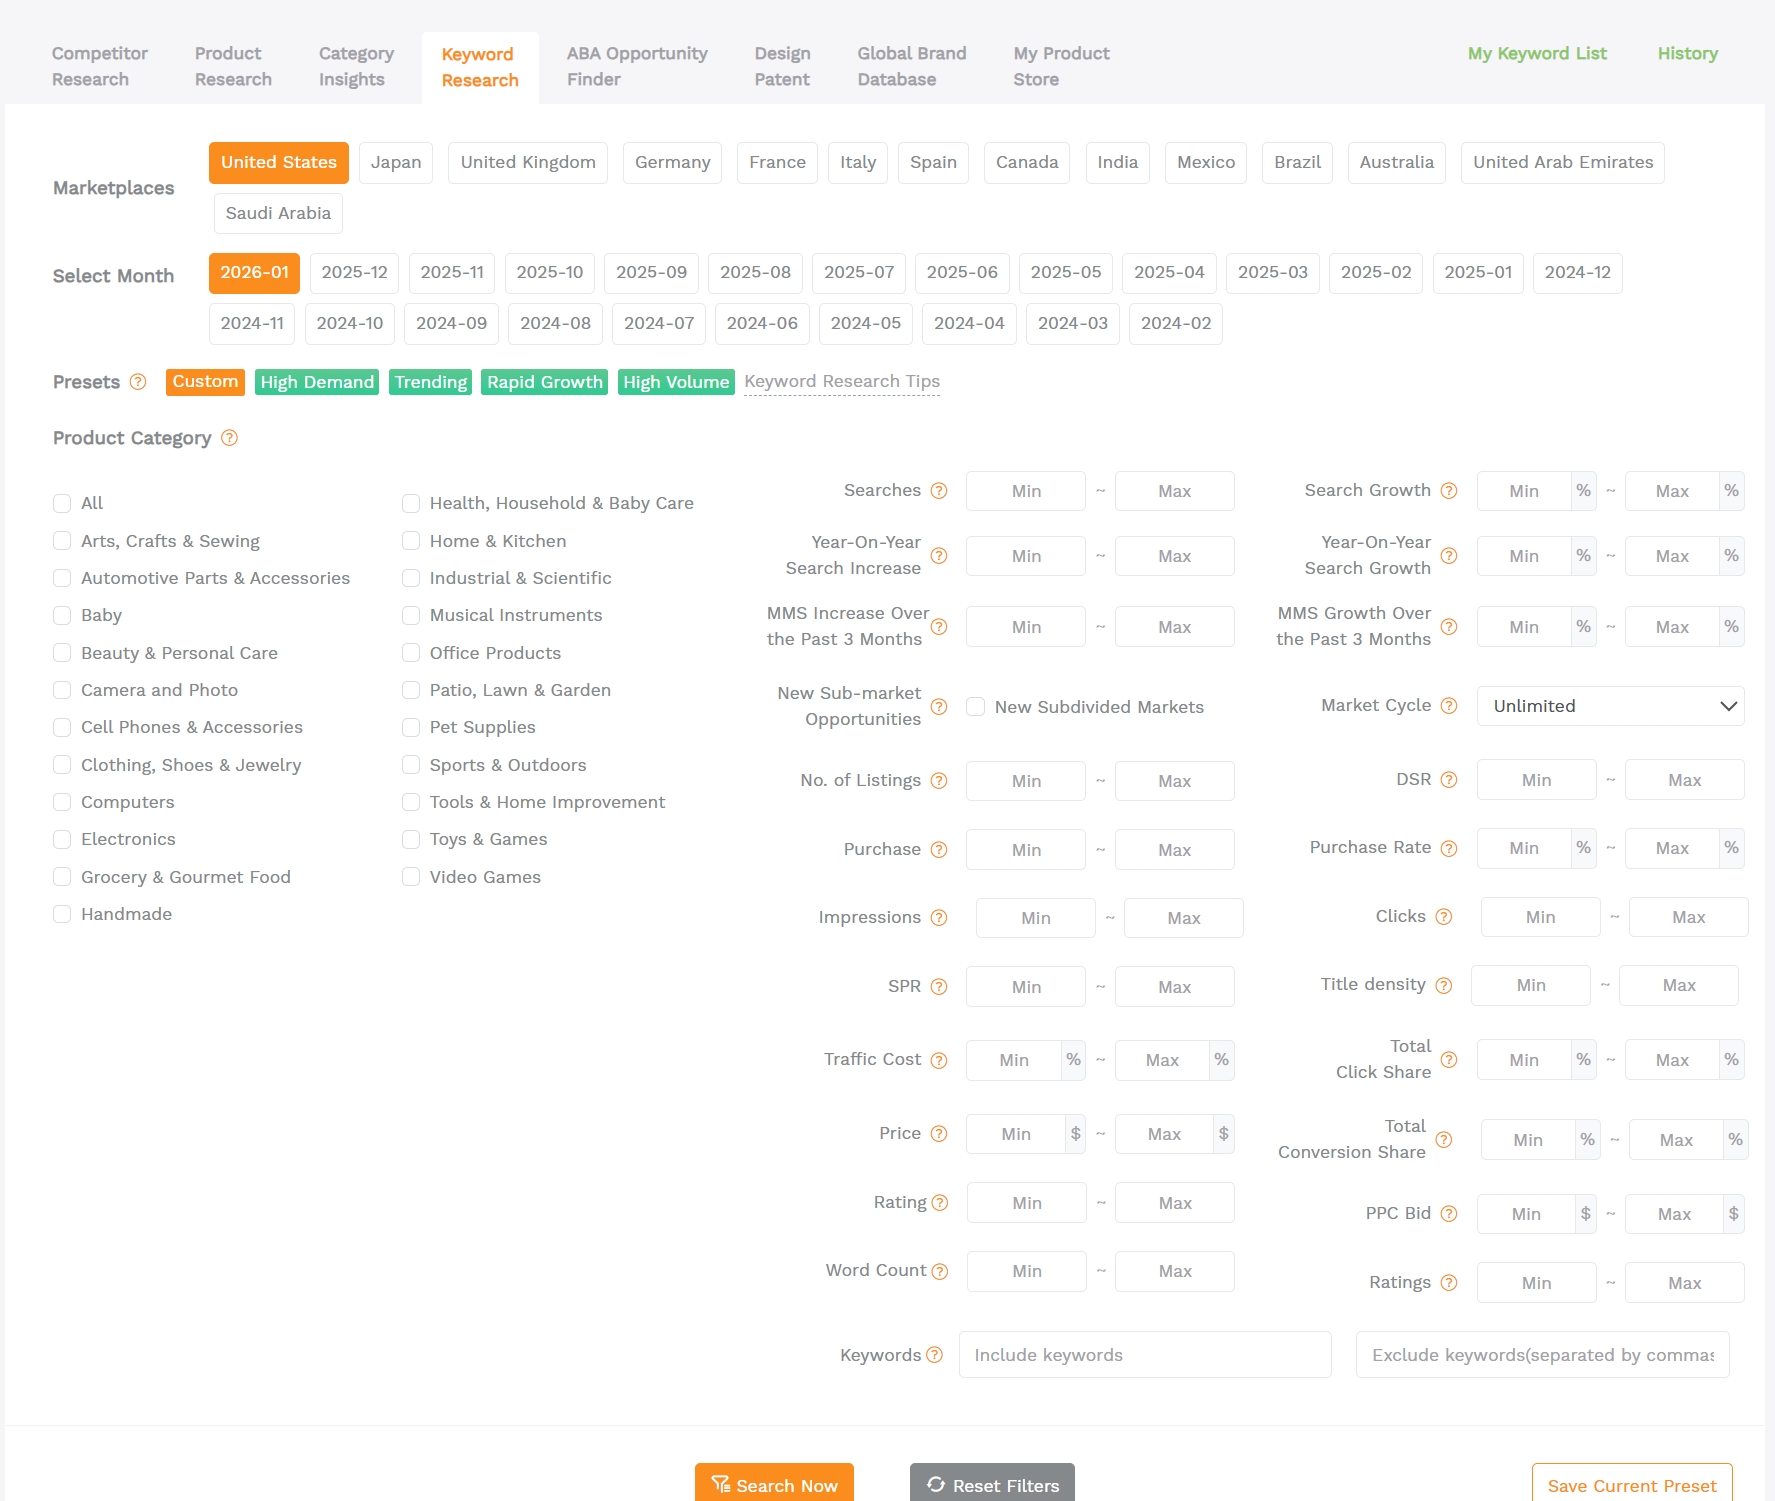
Step 2: Use filters to find high-value keywords
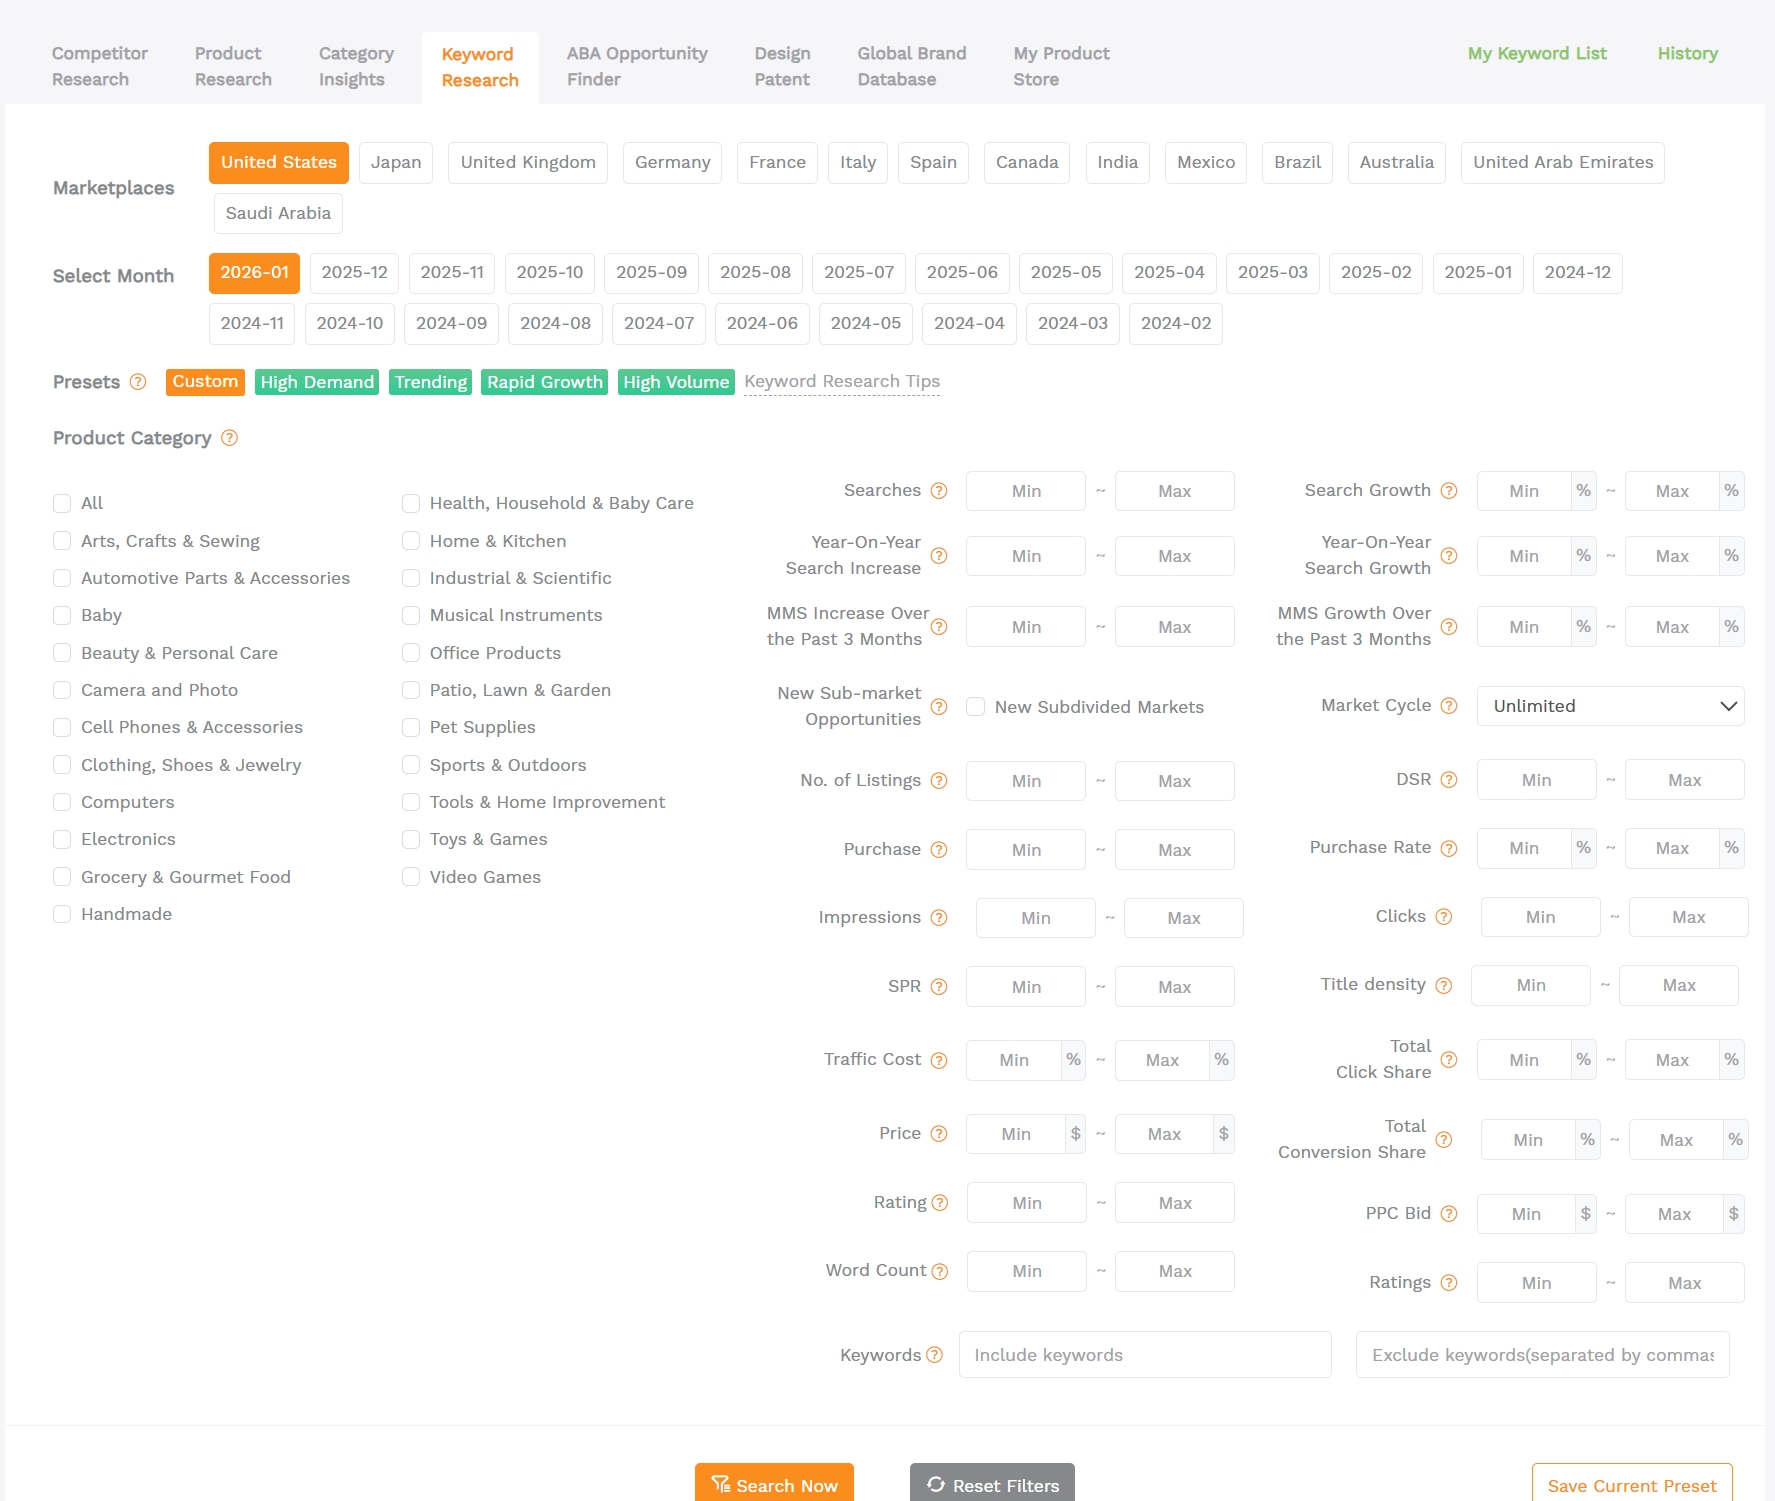
This is where keyword selection becomes objective. Filters turn a messy keyword dump into a shortlist you can actually win.
Key metrics to filter by
- Searches and Search Growth: demand and momentum.
- Purchase Rate: buying intent and conversion strength.
- No. of Listings: competitive crowd size for that keyword.
- SPR: estimated natural sales needed within 8 days to hold page 1 placement.
- Relevancy and Word Count: intent match and long-tail specificity.
- Price and Rating bands: confirm the market fits your positioning.
Use these as starting points, then adjust for your category and budget. If you are exploring a trending niche, a common shortcut is to look for strong recent demand, such as Search Volume in the past 3 months above 10,000 and 3-month growth above 10 percent. For ranking keywords on a new listing, prioritize relevance and winnable SPR first.
Mini example 1: Yoga mat keyword selection
Suppose you sell a premium non-slip yoga mat. Start with "yoga mat" as your seed keyword, then filter for long-tail phrases that match your product spec, such as thickness, material, and use case. Your first launch shortlist might include terms like "extra thick yoga mat non slip" or "non slip yoga mat for hot yoga" because they are more specific and usually convert better.
Mini example 2: Wall shelf keyword selection
If you sell a floating wall shelf, start with "wall shelf" and expand with modifiers that change intent: room, mounting type, load capacity, and style. Then use No. of Listings and SPR to find winnable long-tail keywords like "floating wall shelf for bathroom" or "rustic floating shelves set of 2" that match your exact offer.
Step 3: Build and clean your keyword list
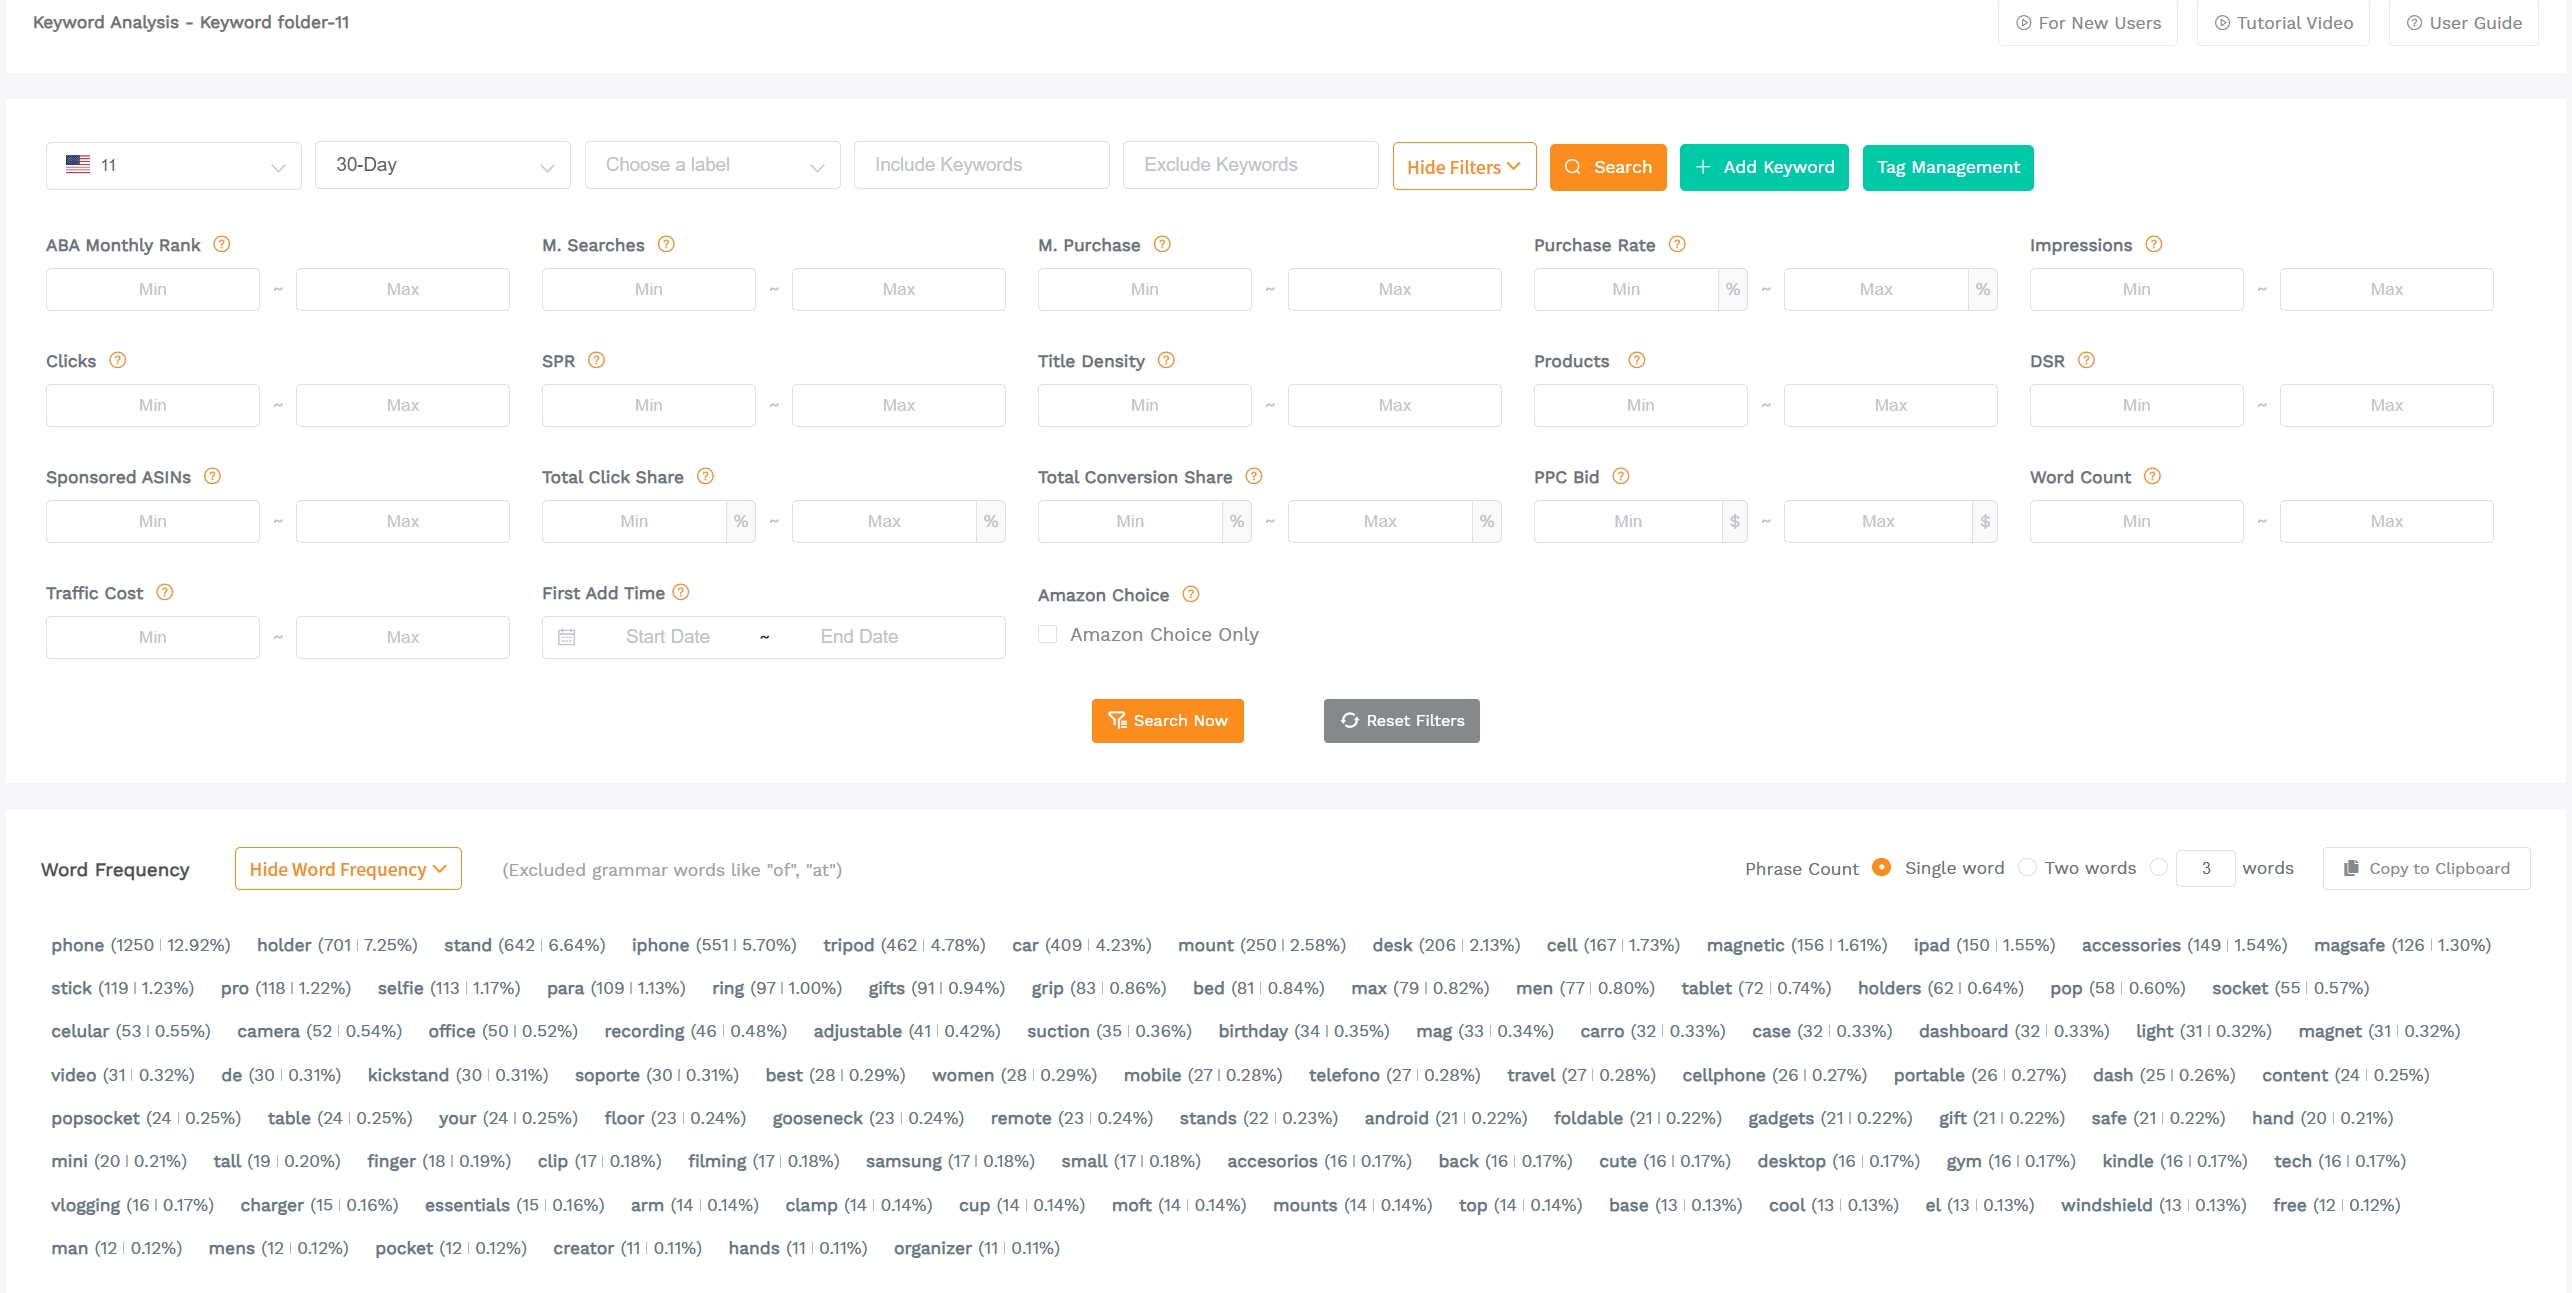
Keyword selection only works if you can reuse it. Your goal is one master Amazon keyword list that you update every week or two, not scattered spreadsheets and screenshots.
Use My Keyword List to stay organized
- Save shortlisted keywords from Keyword Research and Keyword Mining into My Keyword List.
- Remove duplicates and near-duplicates so you do not waste title space or ad budget.
- Tag keywords by intent so placement becomes easy.
Step 4: Apply keywords to listings and ads
The goal is not keyword stuffing. The goal is clean coverage: your listing reads naturally, and Amazon can clearly understand what you sell.
A simple keyword placement template
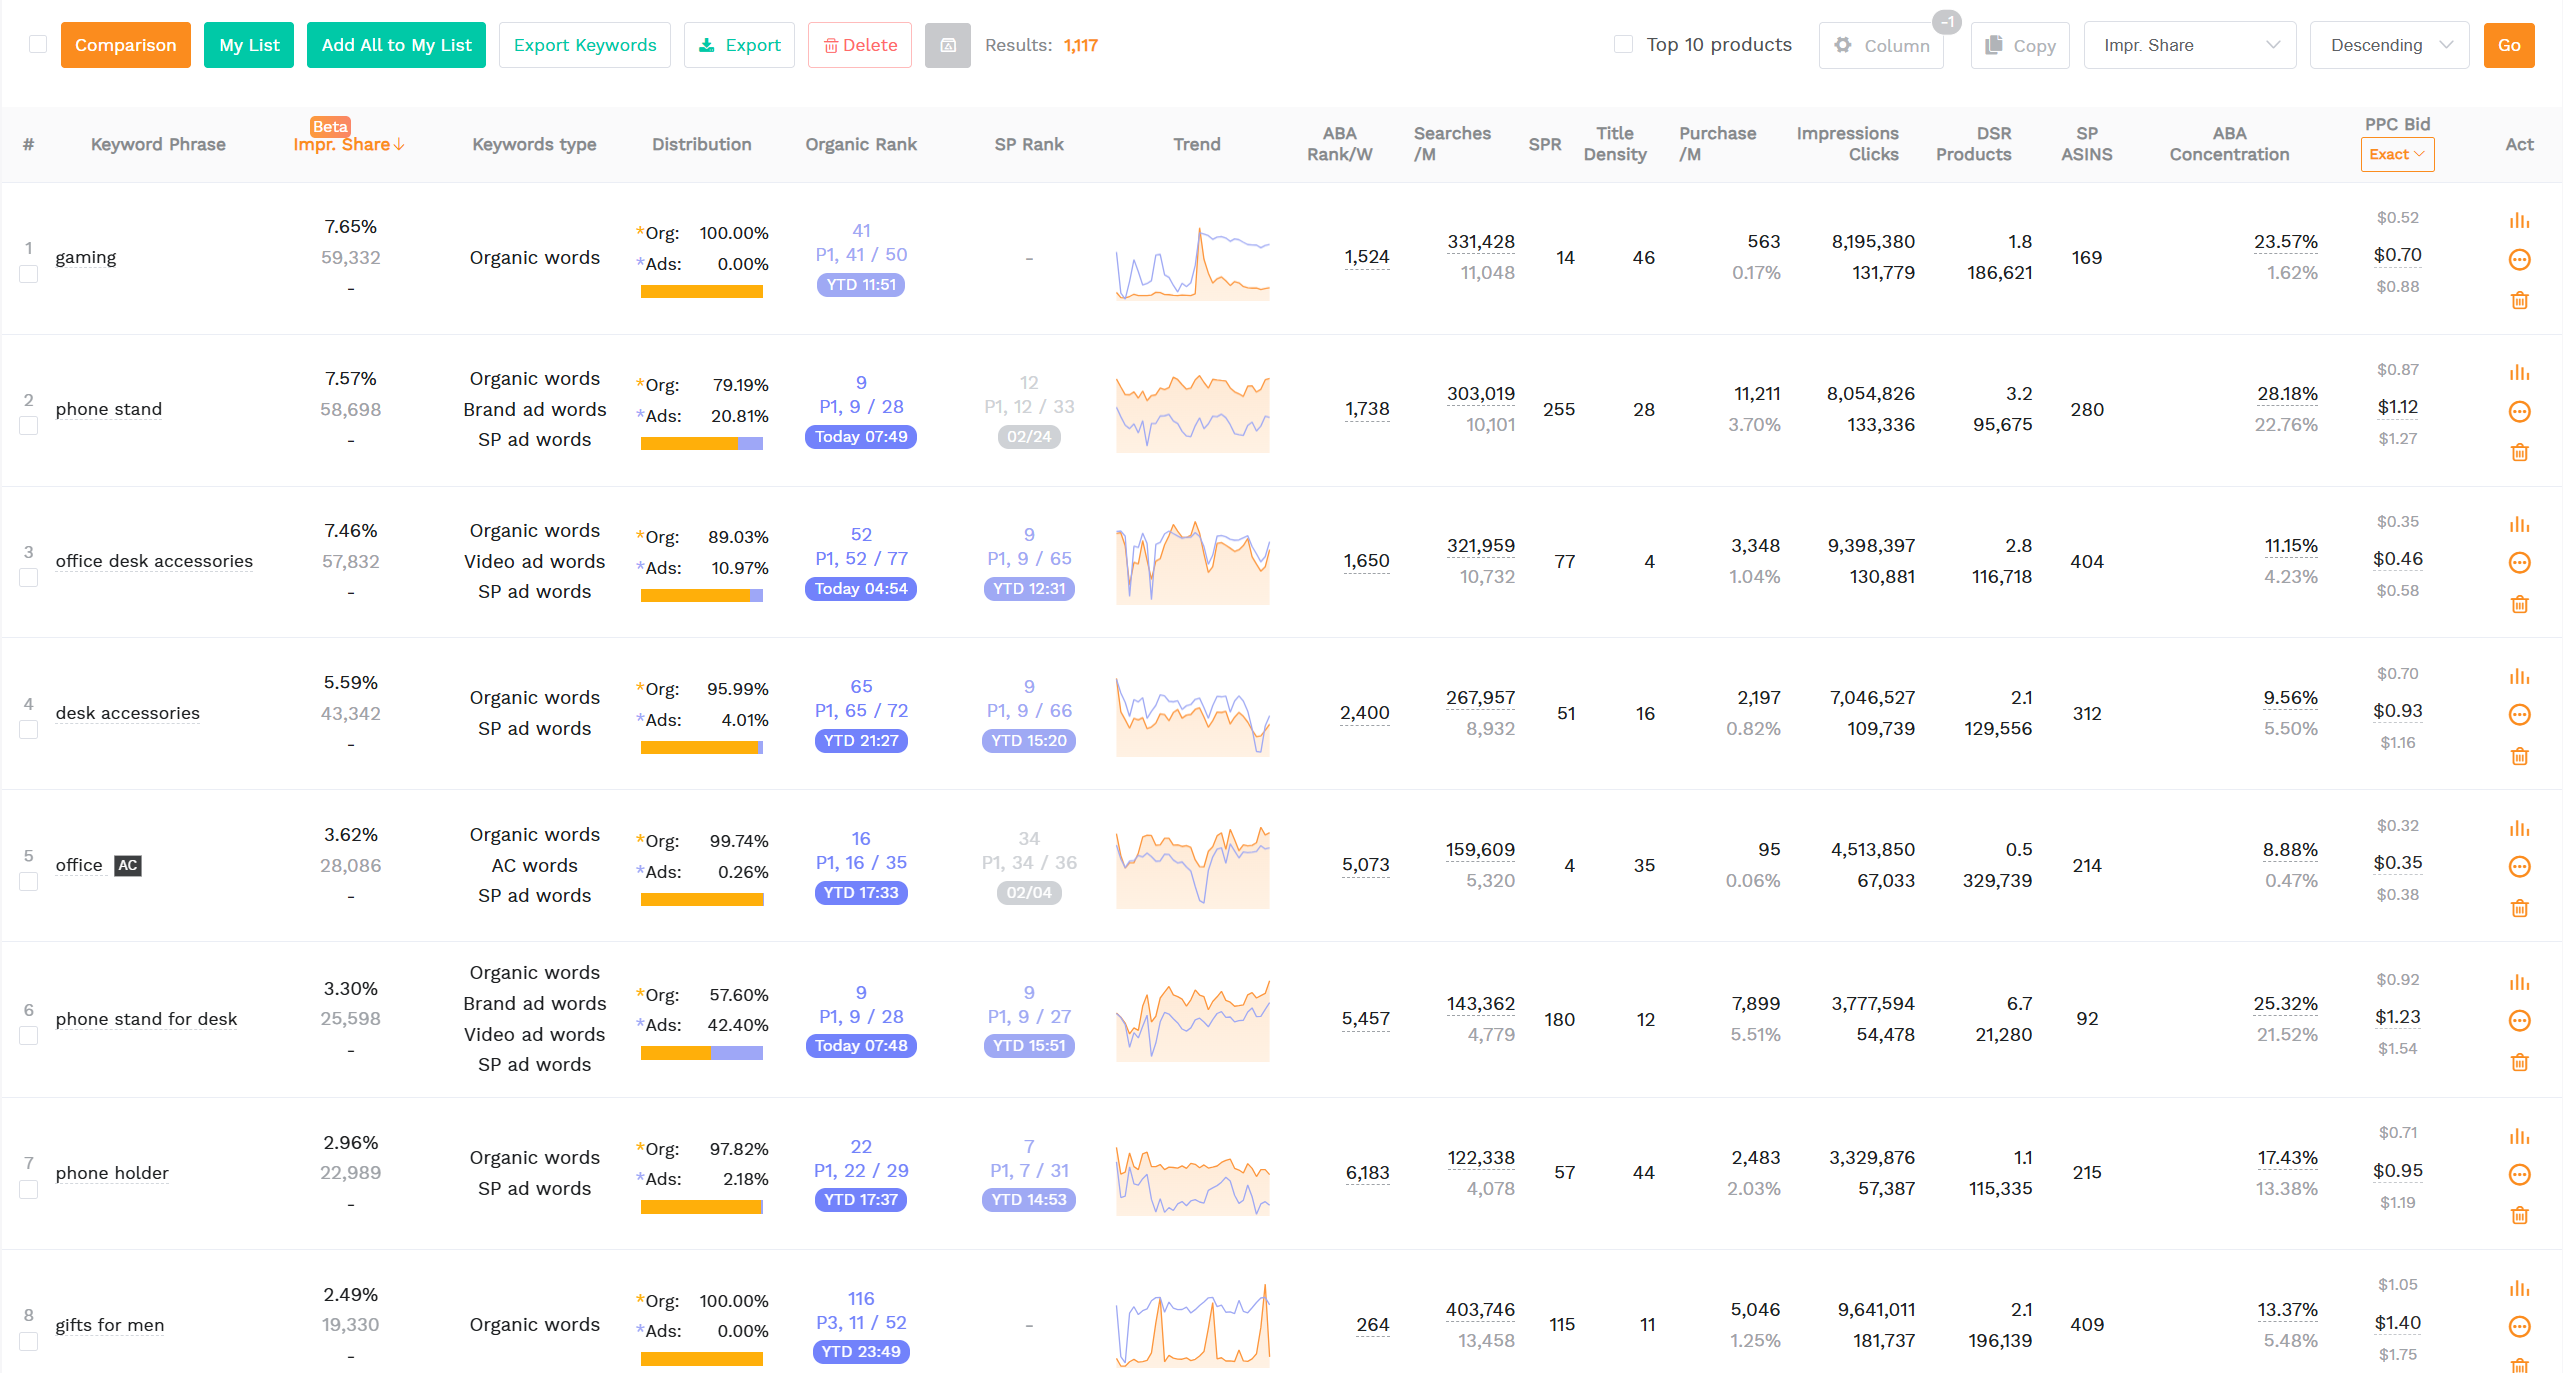
- Pick 5 long-tail keywords with high relevance and low SPR for your first ranking push.
- Add them to your title and top bullets naturally, then build 1 PPC ad group to test them.
- Track ranking movement and refresh your keyword list every 1 to 2 weeks.
Choose keywords for different marketplaces
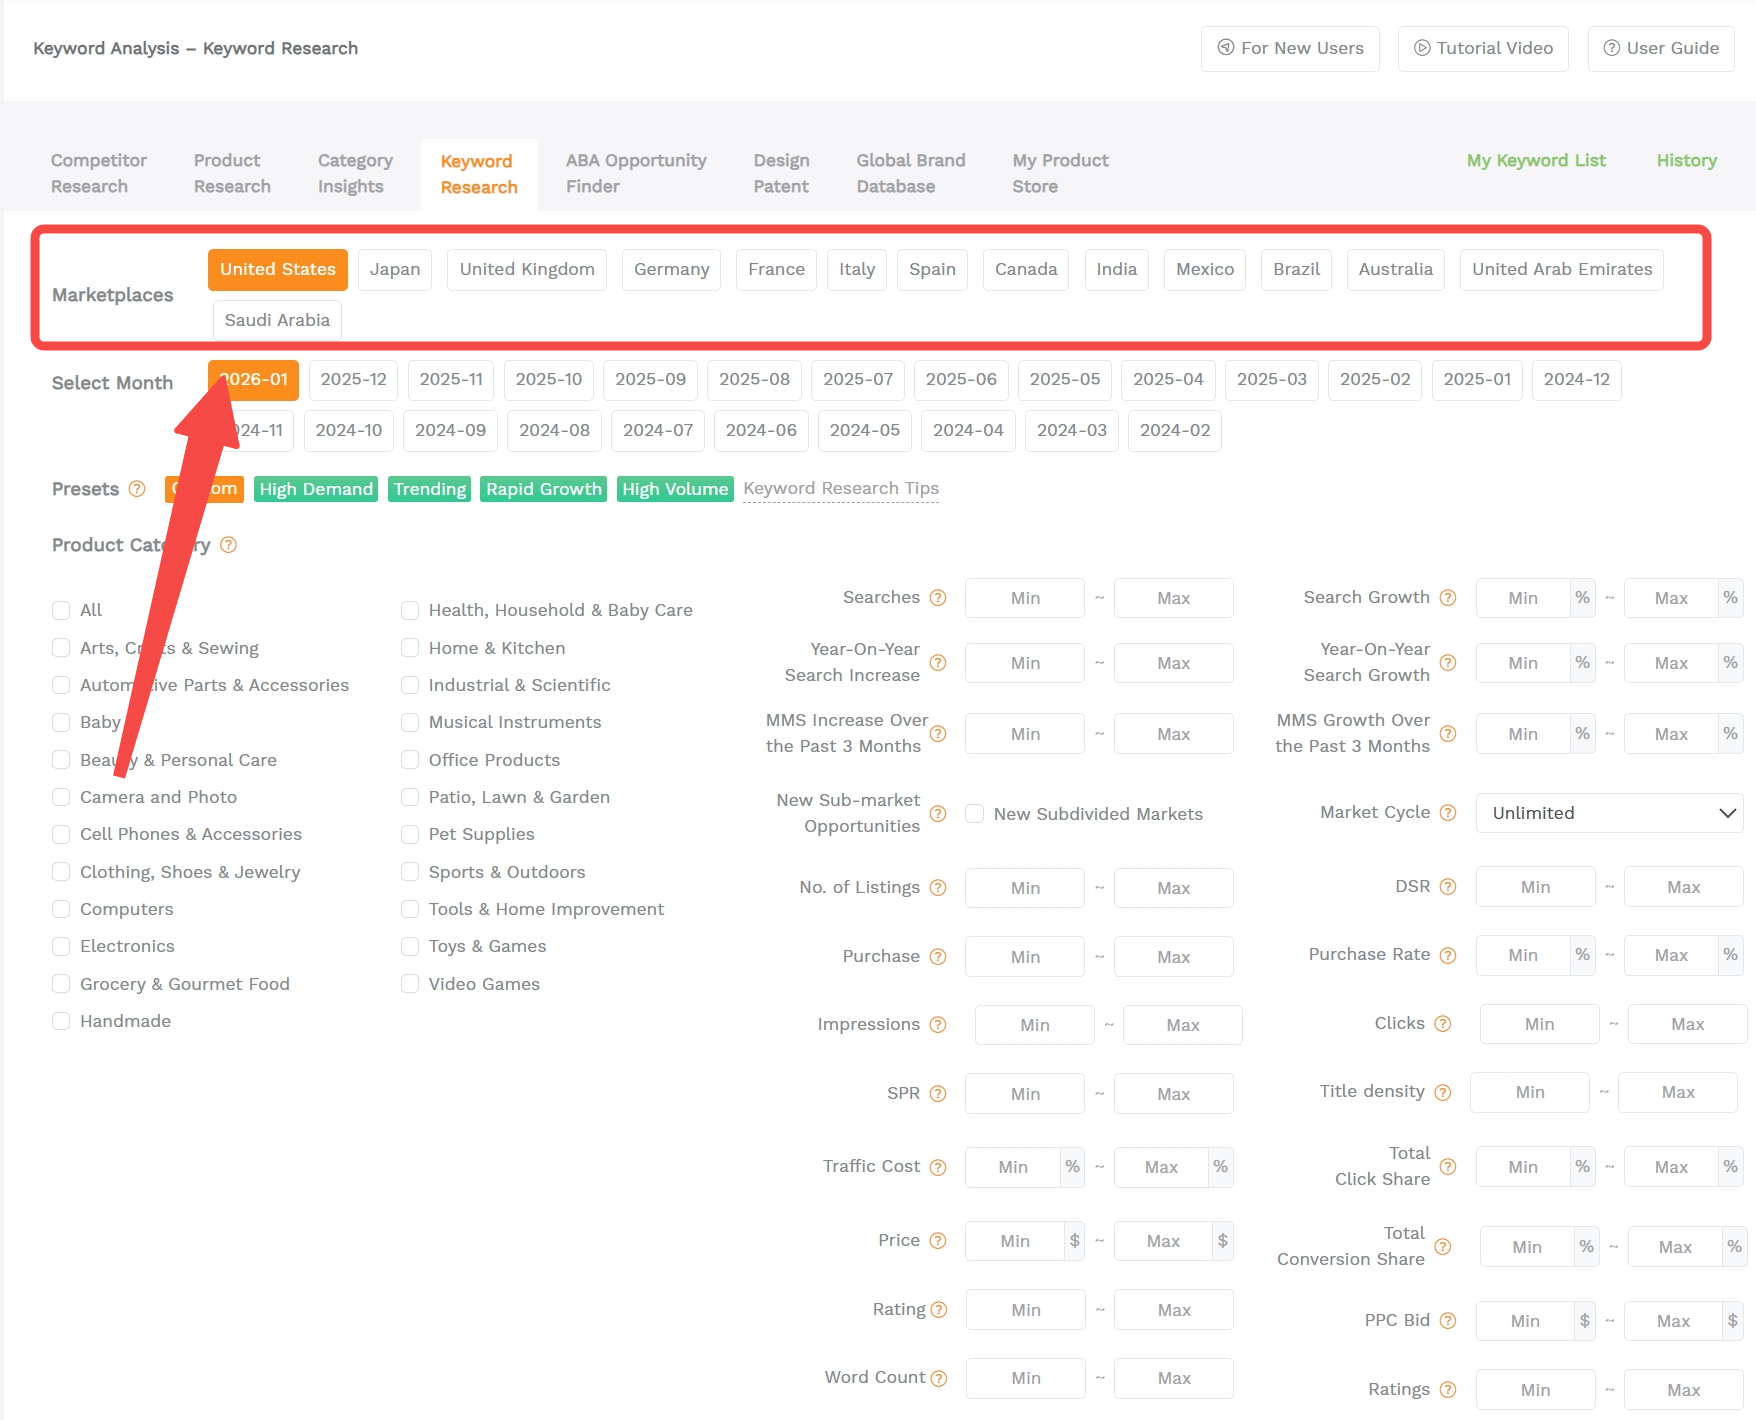
GEO matters. A keyword can be strong in Amazon US and weak in Amazon UK, or the intent can change across languages in Amazon Europe. Always choose the marketplace first in SellerSprite, then run keyword research inside that marketplace.
- Run the same seed keyword in Amazon US and your target EU marketplaces separately.
- Build separate keyword lists per marketplace. Do not mix languages in the same list.
- In each marketplace, filter by Purchase Rate and SPR again. Competition changes by country.
- Localize buyer modifiers. Direct translations often miss real buyer phrasing.
Common mistakes to avoid
- Only chasing high search volume: Add Purchase Rate and Relevancy to your filtering rules.
- Ignoring SPR on new listings: If SPR is too high, you may not be able to sustain page 1 placement.
- Copying US keywords to EU or JP: Run separate keyword research per marketplace and language.
- Not building a keyword list: Without a master list, your team repeats work and misses coverage.
- Keyword stuffing: Use a clean placement plan and let the listing read naturally for humans.
Share Your Sourcing Journey With SellerSprite Community
Join the SellerSprite community on the Facebook Group to share your sourcing journey, ask questions, and get support from fellow Amazon sellers.
FAQ
How many keywords should I target?
Start with 5 long-tail keywords for your initial ranking plan, then expand in batches of 5. For listing optimization, keep one master list, but only promote a small set to the title and top bullets to protect readability.
How often should I update my keyword list?
A simple cadence is every 1 to 2 weeks during launch and every 2 to 4 weeks once stable. Update faster if you change price, main image, or if the market shifts.
Should I prioritize short-tail or long-tail keywords?
Long-tail keywords are usually better at the beginning because they are more specific and often more winnable. Once you build relevance and conversion history, expand into mid-tail and short-tail terms.
What is SPR, and why does it matter?
SPR is a SellerSprite metric that estimates how many natural sales are needed within a short time window to keep a keyword ranking on page 1. Lower SPR generally means the keyword is easier to sustain, which is especially important for new listings.
Can I use the same keywords for Amazon US and Europe?
Do not copy blindly. Run separate keyword research for each marketplace and language, because search volume, competition, and buyer phrasing vary by country.
Further reading
View The SellerSprite Course Directory
Ready for the next step? Open the SellerSprite Academy course directory to continue building your Amazon FBA skills chapter by chapter.
References
- SellerSprite Keyword Research Tool: marketplaces, filters, and keyword research tips
- SellerSprite Help Center: How to Understand SPR
- SellerSprite Help Center: Keyword Mining Guide
- SellerSprite Keyword Explorer: data notes and usage
- SellerSprite Help Center: why ad keywords differ from buyer search terms